Category: PhD life

Transforming Yeast or how to make a GMO

Actual footage of me changing the genes of a hapless yeast, own work

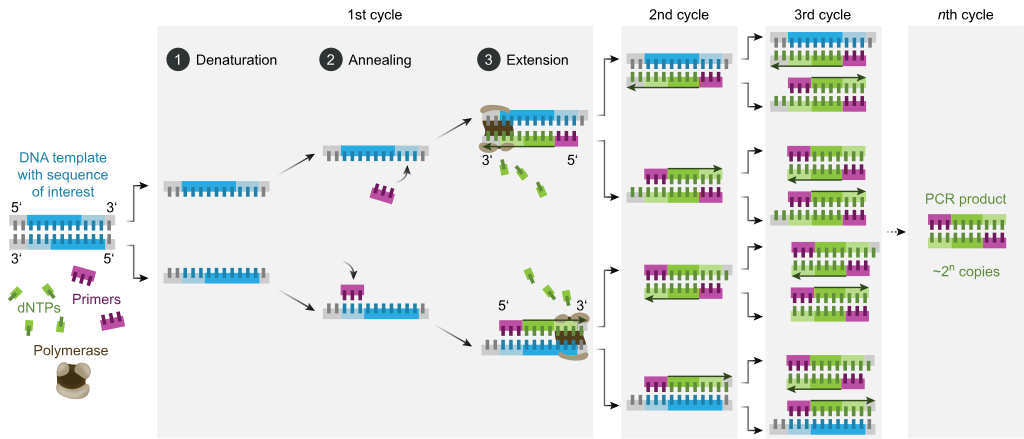
In the last article I ended with a DNA fragment, that I created with a PCR. Now I need to get this DNA into my yeast cells to teach them to age like normal people. This is called transformation. There are several different transformation techniques but most common are elctroporation and chemical transformation. You can spark emotional debates if you ask what is better but the more common and generally a bit easier is the chemical transformation. That is also the method I chose for my aging yeast.

How transformation works mechanistically is not completely understood but the main idea is that you have to overcome the barriers protecting cells from their surroundings. These barriers are the cell wall (for all except animal cells who don’t have one) and the cell membrane. The cell wall’s main responsibility is mechanical stability. You can imagine it like a steel frame that prevents the membrane, which you can imagine like a water bomb, from swelling too much until it bursts. On a molecular level it is a relatively wide net, so it’s not a physical barrier for the DNA molecules. What’s problematic however is that it is electrically charged. DNA is negatively charged and would be repelled from the mostly also negatively charged molecules in the cell wall. This obstacle is overcome by adding positively charged ions that neutralize the charges of the cell wall and allow the DNA to get close to the cell’s membrane.

Schematic structure of a budding yeast cell with a special focus on membrane and cell wall on the right, Giulia Coradello, 2021

But than it has another problem which is the cell membrane. The membrane is a double layer of lipids, fat molecules that have a polar and an uncharged tail. This structure is something like a 2-dimensional liquid. It is relatively elastic and allows uncharged molecules that are not too big to path quite well. Since DNA is huge and strongly charged it normally won’t pass easily. To pass this barrier you have to torture your yeast a bit (*laughs manically in evil scientist). You submit them to a sudden increase of temperature to 42 °C from room temperature. Doesn’t sound too bad but yeast likes it best between 20 and 30 °C above 40 °C starts killing them slowly. This is thought to built differences in pressure between the hot outside and cool inside of the cell which is equalized by the formation of pores in the membrane. Through these pores the DNA can now enter the cell.

To avoid another line of defense of the cells which is enzymes that eat DNA, you also add some carrier DNA, which will be eaten first and so protects the DNA you want to get into the cells. As carrier DNA you normally use Salmon Sperm that you boil and then add to the mix. So if you hear molecular biologists talk about cooking some sperm it’s probably not as weird as it might sound.

After overcoming the defenses you now have a lot of dead cells, many that have taken up nothing or only the carrier DNA but you hopefully also have some that have the DNA that you wanted to introduce into them. What happens with this DNA depends on its form. If it is a closed circle and includes some special signals in the code it will be just kept in the cell and will be copied to the daughter cells when the cell replicates. This is called a plasmid and is good if you just want to introduce genes more transiently without permanently changing the genome. If the DNA (like in my case) is a linear open molecule produced by PCR and has ends that resemble a sequence in the genome of the yeast, it can go into the nucleus of the cell, where the genome is kept. There it can jump in while the cell replicates and integrate permanently into the genome.

Now you have to filter for those cells where this has worked from the rest. You do this with selection. You seed your cells to a medium where only those cells can grow that have taken up your DNA. This is done by adding a marker to the DNA which is a gene that either makes your cells resistant to something that is poisonous to the others or that let’s them live of a food source that the others can’t use. I used cells that normally can’t make Uracil (which is a part of DNA) themselves so they can’t grow on medium where there is no Uracil. They only can grow on this medium if they have taken up my construct which includes a gene that helps them make their own Uracil.

The problem is that this integration is very rare. You start with a huge amount of cells, transform them seed them all to the selection plate and sometimes get nothing, sometimes one or two colonies but sometimes, if you’re lucky, you also get something like 100.

Selection plates of the different transformed strains and a control that was not transformed, own work

To verify that the construct is really integrated where I hoped it would, I now need another PCR. I chose primers that normally produce a short fragment of DNA from the region where I want to integrate my construct. If it is successfully integrated the fragment gets longer which I can see in a gel electrophoresis. And that is what I’m currently doing. I’ll soon give you an update when I’ve finally found my aging yeast.

What’s a PCR and how does it work?

In the last article I ended having a DNA template thanks to Prof. Yu Fu and I had a DNA sequence of the region where I want to integrate my DNA construct. So to now I need to copy a piece of the DNA plasmid (ring) that I have and add a stretch of DNA sequence (~ 50 bases) that are complementary to to the point in the yeast genome where I want to integrate that peace. I can do both in one step with a technique called Polymerase Chain Reaction or PCR.

A PCR is a method to produce DNA without using living cells to do it. It is something like a molecular copy machine. The main ingredients for a PCR are an enzyme called DNA-polymerase, which does the copying, dNTPs, which are the building blocks of DNA, the template DNA from which I want to copy and primers. Primers are small DNA peaces (normally about 20-25 bases long) that define the DNA stretch I want to copy. The forward primer (the start signal) is complementary to the sequence where I want to start the copy and the reverse primer is identical to the sequence where I want to stop the copy.

Schematic drawing of a complete PCR cycle
Schematic mechanism of PCR. CC BY-SA 4.0

The picture above is from the Wikipedia article on PCR that also explains it really well in detail. As you see the first step of a PCR is making the DNA accessible for the copying by heating it until the typical double-strand structure splits up into two single strands. For this you heat it to something around 95 °C. Then you cool it down to the annealing temperature which depends on your primers but is normally a bit above 50 °C. To start the DNA-polymerase you now heat it again to something around 72 °C. This sounds like a very high temperature for an enzyme and it is. The trick is that the polymerase comes from the bacterium Thermophilus Aquaticus (or others) that lives around hydrothermal vents that spew water, smoke, acid and other stuff at temperatures of more than 100 °C. So their enzymes are optimized to work in extremely hot and unpleasant conditions.

Now you repeat these three steps over and over again and with each repeat the number of your DNA constructs doubles. This means you have an exponential growth from 1 to 2 to 4 to 8… to a bit more than a million after 20 cycles to a bit more than a billion after 30 cycles. So you create a lot of identical DNA in quite a short time (normally 1 to 4 hours).

The machine that adjusts the temperature in a programmed manner is called a Thermocycler and looks quite unspectacular.

A typical laboratory Thermocycler made by Eppendorf, own work

This explains how I copy the stretch of DNA from the plasmid but I also wanted to add some sequence to the ends. That’s actually quite easy. I just add the sequence to the primers because they are the beginning and the end of my newly created DNA constructs. Now you might ask: And how do you get these primers? Well like most things today. I order them online. There are companies specialized in producing custom DNA. Basically I could also save myself the whole work and just order my whole construct online but that is still quite expensive. While my exceptionally long primers (primer + sequence are about 60 bases long) cost something between 20 and 50 $, my whole 2500 bases long construct would cost about 1.000 $ to order. That is still quite a difference but it gets cheaper and in a few years biologists will probably order a lot more DNA than they create using molecular techniques like PCR and cloning.

Now that I have my PCR product I want to verify if it is the right one. The easiest way to do that is to put it on a gel that lets short DNA pass quicker than long DNA. Than you add voltage and the negatively charged DNA wanders towards the positive electrode and splits up by size. If you add a marker that includes DNA pieces of known size and a compound that makes DNA visible under UV-light (ethidium bromide) you can see what size the fragments that you produced have. That normally gives you a good idea if the experiment ran as expected.

I did all of that and on the first try the result was no visible DNA at all. Than I changed a few parameters and tried again and saw a very thin band where I expected it and a few others where they shouldn’t be. So I changed some more parameters and on the third try I got this wonderful picture of a gel with a strong band at exactly the position where I expected it.

This made me quite happy but now I had to do something with it. I wanted to put this DNA into a yeast cell and make it integrate into the genome. This is called transformation and is quite tricky as well. I’ll explain that the next time.

Teaching Yeast to Age like normal People Part III

Yeast cells growing on a selective plate, own work

In the post “Teaching Yeast to Age Part II” I explained what I tried first to teach my yeast to shorten its Telomers at each cell division. I also told you that it did not work yet. While I have not yet completely given up on Tretrad dissection, I decided to first try another way. It would already be nice to have my fluorescently tagged cells with a knocked out Telomerase but it would be a lot cooler to be able to switch the Telomerase on and off at will.

power on and off switch on wall
Photo by Mikhail Nilov on Pexels.com

The way I’m trying to achieve this is called promoter shuffle. As you might know, Proteins (like the subunit of Telomerase I’m interested in) are encoded in the genome by a fixed code where 3 letters (called a codon) in the DNA (bases) are translated into one letter in the protein (amino acid). This code is well known and understood. All codes for proteins start with the same start codon and end with one of three stop codons. However to really produce this protein in the cell there needs to be more. The gene needs to be flanked by regulatory code that influences if and how strongly the encoded protein is produced. Most important for this is the so called promoter region. This is the code directly before the start codon. It is normally between 50 and a few hundred bases long. Their code is a lot less understood than that for the protein. There are strong and weak promoters, promoters that are always active and promoters that are switched off or on on specific stimuli.

Since I want to make the Telomerase switchable I take the genetic code for one of its subunits and exchange some of the code before its start codon against something else. There are a handful of common switchable promoters in yeast that are well described but most of them have some disadvantages. I identified a relatively newly identified one that I hope will be a good choice.

It is the promoter of the gene DDI2 that is normally almost inactive but increases its activity more than 1000-fold if the cells are incubated with the chemical cyanamide. In the concentration it is used here cyanamide has almost no effect on the yeast cells.

Exchanging code in the yeast genome luckily isn’t too complicated. Yeast quite readily incorporates genetic material that you feed it if a stretch at the beginning and end of the inserted code match the code in the genome. This process is called recombination. Recombination is also the process that makes children unique instead of copies of their parents because it randomly mixes the genetic material of your parents that is passed on to your kids.

So I need a stretch of DNA containing the 500 bases before the start codon of DDI2 with 50 bases on both ends from the area before the start codon of the Telomerase subunit. I did a lot of thinking how to build this myself but it would have been a lot of work. Then I thought about the paper where I first read about the DDI2 promoter. In the nature article “Fine-tuning the expression of target genes using a DDI2 promoter gene switch in budding yeast” Professor Yu Fu of the Chinese Academy of Sciences and colleagues characterized the promoter and explained how they integrated it in genomic locations.

So I just wrote an email to Professor Fu asking if I could get some of the material they used. He actually replied within a day and said that he’d be happy to help me. He sent me the code of the promoter without expecting anything in return. That’s a great thing about the science community. Most people are happy to share and are really nice if you show interest in their work.

So all I have to do now is add the code stretches at the ends that determine the target where I want to integrate it. I’m doing this with a PCR which I’ll explain in my next article.

Teaching Yeast to Age Part II

In my last post I explained how to get a bag of 4 yeast spores of which one hopefully has the two mutations I want in my new yeast strain. Now comes the really tricky part: You have to find this spore.

Yeast cells under 1000x magnification (DIC), own work

Before I explain the method you have to get an idea on how small one yeast cell is. The average yeast cell is about 3 to 4 micrometers. The smallest distance between two dots to still see them as two with the naked eye is 0.1 mm which is about 300 times a yeast cell. A human hair is on average between 0.06 an 0.08 mm thick, which is 20 times a yeast cell. If you look at the picture above, depicting yeast cells magnified 1000x, the whole frame is about the thickness of a hair.

OK, so they are really small and not visible with the naked eye but we want to find a single spore (that is again smaller than a normal cell) and identify it. The method we use for that is called micromanipulation. A micromanipulator is basically a microscope with a stage (on which you fix the plate with your cells) that can be moved in tiny increments. And it has a lever with a very thin glas needle fixed to it that through some mechanics can also be moved in a very small scale.

My lab has quite a cool and modern micromipulator that has a joystick to move the stage and a computer driving you to positions on a virtual grid on your plate where you can put single cells.
What you now do is you look through a patch on your plate where you’ve put some of your cells. Once you’ve found a bag with 4 spores (which is called a Tetrad) you move the tiny needle really close to it. A moment before the needle would actually touch the plate a meniscus of water forms between the needle tip and the plate that scoops up the Tetrad and hopefully nothing else. Then you move to an empty position on the grid and, by moving and shaking the needle while it almost touches the surface, you try to deposit one of those 4 spores. Then you go to the next spot and do that again. So in the end you get a plate full of 4 spots in a row where you deposited single spores. You can see how it works in the following video.

Me showing how a Tetrad dissection works.

After finishing the sorting I put the plate to 30 °C for one or two days to give the cells time to grow. The result looks like this:

Dissection plate with colonies on it, own work

As you see not all cells I’ve laid out have grown. That is quite normal because not all spores are viable after the procedure. On the left side was the reservoir, where I’ve put a lot of cells to look for Tetrads. I’ve cut that off with a clean scalpel so the cells do not overgrow the rest of the plate.

In the next step now I have to identify which of these cells are really derived from spores (and are haploid) and which of them are actually just normal diploid cells that accidentally lay around with 3 buddies and looked like Tetrads. To do this you use another nice feature of yeast. Wild yeast can live of a lt of things and can make everything it needs (like amino-acids and bases for DNA) semselves. The labstrains you normally use however have some genes they need for this knocked-out. This means to let them grow you need to add some amino-acids and other things to the medium. Now the trick is, that the genetic traits that I want to breed together here are marked with the genetic code that the laboratory strain needs to make these amio-acids themselves. That means I take this plate and stamp it over to a plate where the medium is missing two special amino-acids, only those cells can grow that have both genetic traits that I need. This is called selection.

The problem here is that the diploid cells I mistook for Tetrads also have both markers and can also grow. Here however the statistic can help. Since I always put all 4 cells that were together in one row and in a Tetrad only one of those 4 can have both of the genetic markers, I now have to check my selection plate for rows where only one of the 4 cells has grown. Another test that I can do afterwards is to see if the cells of such a colony mate with other haploid cells of either mating type. Diploid cells won’t do that.

Original plate on the right, selection plate on the left, own work

The results look relatively promising but further analysis showed that this actually hasn’t worked. However this is an important part of science: Things don’t work. After trying this a couple of times I decided to first try another way to teach my yeast cells to age that is a bit more elegant and hopefully works better: I will put a switch on the gene for Telomerase so I can turn it on and off as I want. I’ll explain how this works the next time.

Teaching Yeast to Age Part I

crop unrecognizable black father disciplining adorable attentive son at home
Photo by Monstera on Pexels.com

In my last article I explained the aim of my project, which is making Telomere length of yeast visible. I also explained the first problem for this: Yeast holds its Telomers constant by a tightly controlled use of Telomerase. That means it doesn’t show Telomere attrition as a sign of aging like our somatic cells do.

This is why I have to teach yeast to age like normal people first. The most obvious strategy to do this is to switch off their Telomerase. In molecular biology you normally do this by removing or destroying the gene or in this case one of the genes that code for Telomerase. We call this a knock-out mutation or just knock-out.

One of the big advantages of yeast as a model organism is, that there are libraries of yeast strains available where you can not only find yeast strains with any protein tagged with Green fluorescent protein (as I explained last time) but also strains with any gene knocked-out. An exception are obviously genes that are so vital that knocking them out makes the yeast in-viable. The genes associated with Telomerase are a bit special in this because yeast with one of them knocked-out is viable but only for a certain number of generations (about 400). One generation under ideal circumstances is about 90 minutes for yeast. So after cultivating them for about 4 weeks their first Telomere become critically short and their cell cycle is stopped permanently. They go into a phase of senescence like our somatic cells at that point.

So basically it would be easy to just thaw one of these knock-out strains from our – 80 °C freezers and I’ve got yeast that ages. The problem however is that I also need a mutation from another library. As I explained in the last article I want to use Telomere associated proteins that are fused with Green fluorescent protein as a marker. So I’ve got a few options: I can take a strain with one mutation and do the other mutation myself. I’ll tell you another time how that works.

Or I can bring both mutations into one cell by mating the two strains. Now I have to explain another cool feature of yeast as a model organism. You might have heard that all the genetic information in your cells is kept in two versions. One from your father and one from your mother. This is called diploid. It has some advantages to have this. The most obvious is that if an important gene is broken on one of your chromosomes there is still a second copy of it from your other parent that can fix it. On the other side in our germline cells (eggs and sperm cells) there is only a single copy of each chromosome. This is made by randomly mixing the the chromosomes you’ve got from your parents. This is also why each egg and each sperm is genetically different. This is called haploid. This form is obviously practical for sexual reproduction because it stops us from collecting more and more copies of the same information in our cells. But it is also great for me as a molecular biologist because if I want to switch off a gene I only have to do so once. There is no second copy that could make trouble.

Now comes the great thing about yeast: It can stably live in a haploid and a diploid form. There is no male or female yeast but there is something similar: The mating types Mat a and Mat alpha. Haploid (only one set of chromosomes) yeast can be either Mat a or Mat alpha and can only mate with the other mating type upon which they produce diploid offspring and stay diploid. Diploid yeast is both Mat a and alpha but not at the same time. It normally changes it’s sex every time it produces offspring. Diploid yeast only mates with diploid and not with haploids even it it currently has the opposite sex. To make diploid yeast haploid again they need to sporulate. Spores are a dormant form of yeast that the produce in bad times. In the lab you create bad times for them by first giving them ample sugar and than suddenly putting them on a very strict diet.

So how does this all help me produce a haploid yeast strain with mutations from two different strains? I first cross the two mutant strains of opposing mating type from which I get a diploid strain with one of the mutations on one set of its chromosomes, the other mutation on the other. Then I bring them to sporulate by setting them on a diet. In the process of sporulation one diploid cell produces four genetically different haploid spores by randomly sharing parts of their chromosomes from each of their two parents. These four spores stay together in one bag (called the Ascus) until times get better and they grow out again and mate. Now if I’m lucky one of these 4 spores has both of the mutations I want in it.

Now the big trick is finding it and this is done by sorting single tiny yeast cells. I’ll show you this crazy technique next time.

How to find scientific papers

Books in a Library, Photo by Susan Q Yin on Unsplash

Finding firsthand scientific information is hard. First most articles use scientific slang that is hard to understand if you are not specialized in this field. However it is often worth it since you get rid of the filter of normal news journalists who often do not really understand the papers themselves and sometimes really do not get the right point. If you regularly read popular science pages you might have noticed that the authors of those articles are often a bit overly enthusiastic about some research results. They overstate because click baiting is a way of earning money with your news site.

Since that is not the case with scientific papers (they do not normally earn money for their authors) their tone is a lot more honest.

Now if you are looking for scientific papers you can use Google but that is not very specific. One of the most standard search pages for scientific papers is pubmed and it does this quite well. But after you found an interesting article here it often puts you in front of the next barrier to enlightenment, namely a pay wall.

To avoid these your first step is back to Google. However not to the normal search but to Google Scholar. The main difference to Pubmed is that on the right side of the search results Google shows you other pages with the same article and especially those where they are available for free.

This already helps a lot but there are still some articles that Google Scholar won’t offer you for free. The next tool to also find most of them is Sci-Hub. This is a tool that works in a bit of a grey zone. It collects articles from authors who, if you contact them directly, normally gladly share their manuscripts with you for free.

I think it is totally legitimate to offer free access to research that in the overwhelming majority has been paid for by public money.

Now you should have access to almost all scientific papers you need. If you still find an article that is not available for free with these tools, you should try to contact the authors (contact details should be directly below the title even in the preview). Most of them will be happy about the interest in their research.

I’ll later write a post about how to organise and store all your newfound scientific knowledge.

Scroll to TopCookie Consent with Real Cookie Banner